
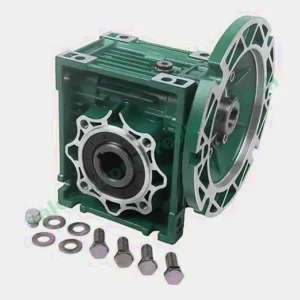
A worm reducer is a type of gear reducer that uses a worm gear to reduce the speed and torque of a mechanical system. It is commonly used in applications where space constraints, high torque, or the need for smooth and quiet operation are essential. Installing a worm reducer requires careful planning and attention to detail to ensure proper functionality and longevity. This guide provides step-by-step instructions for installing a worm reducer in your system.
Step 1: Preparation
1.1 Verify Specifications
Before starting the installation, ensure that the worm reducer you have selected meets the requirements of your application. Review the manufacturer’s specifications for the reducer, including the input and output shaft sizes, mounting configuration, and torque ratings. Double-check that the reducer’s speed ratio and performance specifications align with your system’s needs.
1.2 Gather Tools and Equipment
To install the worm reducer, you’ll need the following tools and equipment:
Wrenches and sockets
Screwdrivers
Lubrication oil (if required)
Mounting brackets or base plates (if applicable)
Torque wrench
Alignment tools
Safety gloves and goggles
Ensure you have access to these tools before beginning the installation.
Step 2: Safety Precautions
Always take proper safety precautions when installing mechanical equipment. Wear protective gloves and goggles to prevent injury from sharp edges or flying debris. Make sure the power supply to the system is turned off before working with the reducer, and always follow the manufacturer’s safety guidelines.
Step 3: Position the Worm Reducer
3.1 Check Mounting Space
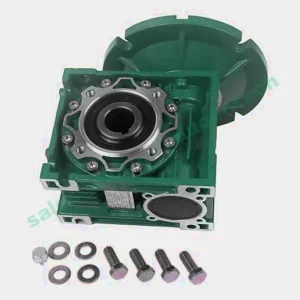
Before installing the worm reducer, ensure there is sufficient space for its installation. The reducer should be mounted in a stable position with adequate clearance for cooling and maintenance. If mounting brackets or a base plate are required, secure them in place before proceeding.
3.2 Mounting the Reducer
Most worm reducers are mounted on a shaft or a base plate. The mounting configuration will depend on the specific reducer model, but the following general steps apply:
Input Shaft Alignment: The input shaft of the motor should be aligned with the input shaft of the reducer. Use alignment tools to ensure that both shafts are in line to prevent any misalignment during operation.
Fixing the Reducer: Secure the reducer to the mounting base or frame using the appropriate bolts or screws. Ensure that all fasteners are tightened to the manufacturer’s recommended torque value. This helps to avoid any looseness or vibration during operation.
Output Shaft Alignment: Once the reducer is securely mounted, align the output shaft with the driven equipment, such as a conveyor or rotating machinery. This will ensure smooth torque transfer between the reducer and the system.
Step 4: Connect the Worm Reducer
4.1 Shaft Couplings
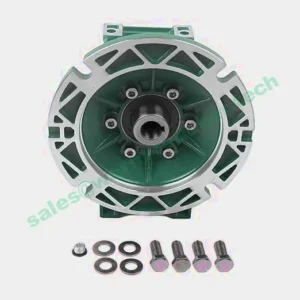
If the worm reducer uses shaft couplings to connect the input and output shafts, carefully install the couplings onto both shafts. Ensure that the couplings are properly aligned and securely fastened to avoid any movement during operation. Use a torque wrench to tighten the bolts to the manufacturer’s specifications.
4.2 Install Keyed Hubs (if applicable)
In some cases, the worm reducer may have keyed hubs to prevent slipping between the reducer and the connected machinery. Install the keyed hubs on both the input and output shafts, ensuring that the keys are correctly positioned in the keyways. Tighten the set screws or bolts to secure the hubs in place.
Step 5: Lubrication
5.1 Check Lubrication Requirements
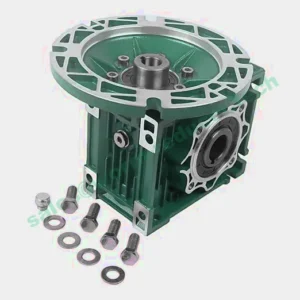
Many worm reducers require lubrication to ensure smooth operation and prevent overheating. Check the manufacturer’s instructions to determine the appropriate lubricant for your specific model. Some reducers are shipped pre-lubricated, while others may require you to add lubricant during installation.
5.2 Add Lubricant
If lubrication is necessary, fill the reducer with the recommended type and amount of oil. Check the oil level through the sight glass or the oil filler plug. Ensure the oil level is within the specified range to prevent damage to the gears. Use high-quality gear oil to minimize friction and wear.
5.3 Seal the Lubrication Ports
After adding the lubricant, ensure that all lubrication ports are sealed properly to prevent leaks. Tighten the filler plug and drain plugs securely.
Step 6: Electrical Connections (if applicable)
For electric motor-driven worm reducers, connect the motor’s power supply to the input of the reducer. This step may involve connecting wiring, terminals, and ensuring that the motor’s voltage and current ratings match those of the reducer. Consult the manufacturer’s wiring diagram to correctly connect the electrical components.
Important: If you are unsure about the electrical connections, always seek assistance from a qualified electrician to ensure safety and compliance with electrical codes.
Step 7: Testing and Adjustments
7.1 Initial Test Run
Once the worm reducer is installed, perform a dry run to test the system. Turn on the power supply and observe the reducer’s operation for any unusual noises, vibrations, or overheating. Check for smooth operation without slipping or jerking.
7.2 Adjustments
If you notice any abnormal noises or vibrations, stop the machine immediately. Inspect the alignment of the shafts, couplings, and mounting bolts. Make any necessary adjustments to ensure proper alignment and tightening. Re-check the lubrication level and add more oil if needed.
7.3 Final Check
After confirming that the reducer is running smoothly, recheck all fasteners, electrical connections, and the oil level. Tighten any loose bolts or screws and ensure the system is secure.
Step 8: Regular Maintenance
To extend the lifespan of the worm reducer, it is essential to perform regular maintenance. Follow the manufacturer’s guidelines for periodic oil changes, inspections for wear and tear, and alignment checks. Monitor the operating temperature of the reducer to prevent overheating, and ensure that the lubrication remains at the correct level.